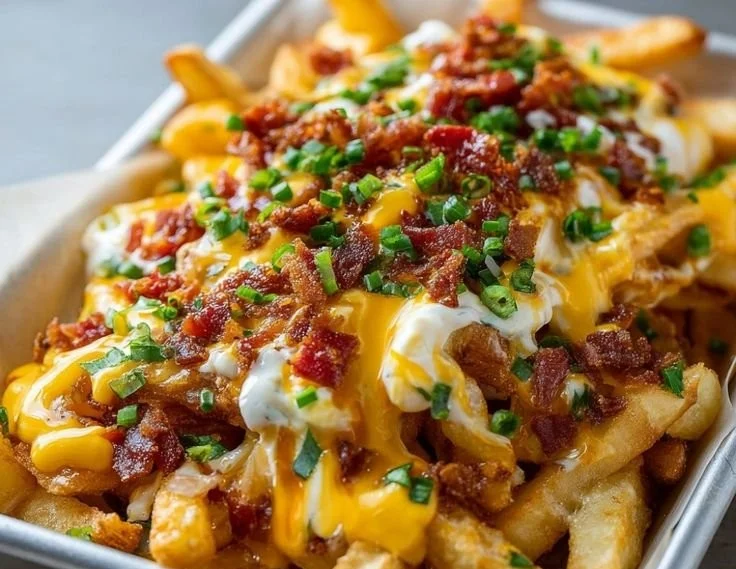
Loaded Fries: Sticky, cheesy, all-the-comfort flavors piled high — a snack that doubles as a meal and an instant crowd-pleaser. Imagine the warm, salty aroma of golden fries filling the kitchen, the sharp tang of melted cheddar giving way to savory beef and the bright pop of dill pickle. Each bite offers a satisfying crunch that yields to gooey cheese and a juicy, seasoned bite of beef. This is the kind of food that makes people smile, gather around the platter, and start swapping stories while passing plates.
Perfect for game nights, casual weekend dinners, late-night cravings, or cozy movie afternoons, loaded fries are simple to assemble and infinitely adaptable. If you want extra-crisp fries, consider a quick read of this guide to getting oven fries extra-crispy for crunchier results, which pairs well with the assembly steps below.
At a Glance
- Prep Time: 10 minutes
- Cook Time: 20–25 minutes (plus 5 minutes re-melt)
- Total Time: 35 minutes
- Servings: 4 generous servings
- Difficulty Level: Easy — great for cooks of any level
Nutrition Highlights
Estimated nutrition per serving (1 of 4 servings). These values are approximate and were calculated using standard portion sizes and verified nutritional databases such as USDA FoodData Central and government nutrition resources (values rounded):
- Calories: ~830 kcal
- Protein: ~40 g
- Carbohydrates: ~38 g
- Fat: ~54 g
- Saturated Fat: ~23 g
- Sodium: variable (depends largely on fries, cheese, and pickles)
- Fiber: ~5 g
Notes: This is a hearty, energy-dense dish — suitable for sharing and indulgent moments. For specific dietary tracking, use the exact brands and quantities you choose and consult USDA FoodData Central or a registered dietitian for precise adjustments.
Perfect For…
This loaded fries recipe shines when you want maximal comfort with minimal fuss. Key reasons to make it:
- Crowd-pleasing flavor: salty, savory, tangy, and cheesy notes combine to satisfy many tastes.
- Slow-sharing social food: ideal for game days, casual gatherings, or family movie nights.
- Quick weeknight upgrade: if you’re short on time, the bulk of the work is hands-off (baking fries); assembly is fast.
- Nostalgia & celebration: evokes diner-style indulgence and works as a festive appetizer or main for informal occasions.
Preparation Guide
Ingredients (serves 4)
- 1 lb (450 g) frozen French fries (oven-ready)
- 1 lb (450 g) ground beef (80/20 recommended for flavor)
- 8 oz (225 g) sharp Cheddar cheese, shredded
- 1 small yellow onion, finely diced (about 100 g)
- 3 dill pickles, chopped (about 150 g)
- 4 tbsp ketchup
- 2 tbsp yellow mustard
- 1/2 tsp salt (for beef)
- 1/4 tsp freshly ground black pepper (for beef)
- Optional: chopped green onions or cilantro for garnish, hot sauce for heat, jalapeños for spice
Optional ingredients and substitutions:
- For leaner protein: use 90/10 ground beef or ground turkey (expect slightly less fat/calorie content).
- For a vegetarian version: swap ground beef for seasoned, crumbled tempeh or cooked lentils.
- Cheese alternatives: Monterey Jack, Colby, or a dairy-free cheddar for vegan options.
- Fries: sweet potato fries can be used for a sweeter, more nutrient-dense twist.
Step-by-step instructions
- Preheat oven and bake fries: Preheat your oven and bake the frozen French fries according to package instructions until golden and crispy (typically 20–25 minutes). Arrange evenly on a large baking sheet for even browning.
- Cook the beef: While fries bake, heat a large skillet over medium heat. Add the ground beef and cook, breaking it up with a spatula, until fully browned (6–8 minutes). Drain excess fat if desired, then season with 1/2 tsp salt and 1/4 tsp pepper. Stir to combine.
- Assemble: When fries are done, transfer them to an oven-safe platter or keep them on the baking sheet. Scatter the cooked ground beef over the hot fries, then sprinkle shredded Cheddar evenly across the top. Add diced onions and chopped pickles.
- Melt the cheese: Return the assembled fries to the oven for about 5 minutes, or until cheese is fully melted and everything is heated through.
- Finish and serve: Remove from oven, drizzle ketchup and mustard over the top (or serve on the side for dipping). Garnish with green onions or jalapeños if using. Serve hot.
Practical tips:
- Avoid overmixing the beef while cooking — break it into bite-sized pieces but let it brown for flavor.
- If your fries are crowded on the baking sheet, they’ll steam rather than crisp — spread them out in a single layer.
- Keep an eye on cheese melting time; a broil for 30–45 seconds can speed melting but watch closely to avoid burning.
Best Pairings
- As a casual main: Serve with a crisp, green salad tossed in a tangy vinaigrette to balance richness.
- As an appetizer or shared plate: Pair with cold beer, a citrusy soda, or an easy margarita for parties.
- Comfort combo: Add a side of coleslaw or pickled carrots to cut through the richness.
- For breakfast-ish vibes: Top with a soft-fried egg per serving for a runny yolk that dresses the fries beautifully.
- Presentation tip: Serve on a large platter or cast-iron pan, garnish with chopped herbs, and provide small bowls of extra ketchup, mustard, and hot sauce.
Keeping it Fresh
- Room temperature: Not recommended to leave loaded fries at room temperature for more than 2 hours (follow standard food safety guidance).
- Refrigeration: Store leftovers in an airtight container in the refrigerator for up to 3 days. Reheat in an oven or toaster oven at 350°F (175°C) until heated through to help restore crispness.
- Freezer: Assembled loaded fries do not freeze well (texture suffers). You can freeze components separately: cooked, seasoned ground beef for up to 3 months; shredded cheese and pickles freeze poorly for texture — avoid freezing them. Frozen fries can be kept per package instructions.
Insider Secrets
- Crisp is king: For extra-crispy fries, half-bake the fries, then finish under the broiler for 1–2 minutes right before assembling.
- Beef flavor boost: Add a teaspoon of Worcestershire sauce or a pinch of smoked paprika to the beef while cooking to deepen savory notes.
- Cheese layering: Reserve a small handful of cheese to add after melting; this gives an attractive, fresh-melted top layer.
- Control salt: Because fries, cheese, and pickles can be salty, taste as you go and season the beef lightly.
- Even distribution: Use a slotted spoon to scatter beef so grease stays off the fries as much as possible, keeping them crisper.
Fun Flavor Ideas
- Tex-Mex: Swap cheddar for pepper Jack, add black beans and corn, and finish with chopped cilantro and a squeeze of lime. Serve with sour cream or guacamole.
- BBQ Beef & Ranch: Stir 2 tbsp BBQ sauce into the cooked beef, use smoked cheddar, and swap ketchup/mustard for ranch drizzle and extra BBQ on the side.
- Vegan version: Use seasoned crumbled tempeh or plant-based burger crumbles, dairy-free cheese, and vegan mayo or mustard. Use olive oil–baked fries or sweet potato fries for added depth.
- Greek twist: Use lamb or beef seasoned with oregano and garlic, top with feta instead of cheddar, and finish with diced tomato and tzatziki.
Recipe Q&A
Q1: Can I make these ahead of time?
A1: Partially — cook the beef and store separately (up to 3 days refrigerated). Bake fries and assemble close to serving time for best texture.
Q2: How do I make this healthier?
A2: Use lean ground turkey or 90/10 beef, bake or air-fry the fries (or make your own from fresh potatoes), and use reduced-fat cheese or a smaller amount of cheese.
Q3: My fries went soggy — how to fix?
A3: Re-crisp in a hot oven or toaster oven at 400°F (200°C) for 5–10 minutes; avoid microwaving which will steam them.
Q4: Can I use homemade fries?
A4: Absolutely — homemade shoestring or wedge fries add freshness. For thin, crisp fries, try this shoestring technique for inspiration to make crisp shoestring fries.
Q5: What’s a good cheese-to-beef ratio?
A5: A good starting point is a 1:1 weight balance for a prominently cheesy dish (e.g., 8 oz cheese to 8 oz cooked beef), but adjust to taste.
Conclusion
Give these loaded fries a try next time you want a guaranteed crowd-pleaser — they’re easy to assemble, crave-worthy, and endlessly customizable. If you’re curious about other loaded-fry takes or want inspiration for fun crispy shapes and seasonings, check out this approachable loaded fries recipe for ideas and plating inspiration at Loaded Fries Recipe – Kylee Cooks, and for a playful curly-fries variation that’s great for parties, see the loaded cheesy curly fries guide at Loaded Cheesy Curly Fries – Flourishing Foodie. Share your photos and tweaks in the comments — I love seeing your versions and tips!