Garlic Herb Dutch Oven Bread Recipe You’ll Love Today!
Introduction — a warm, sensory welcome
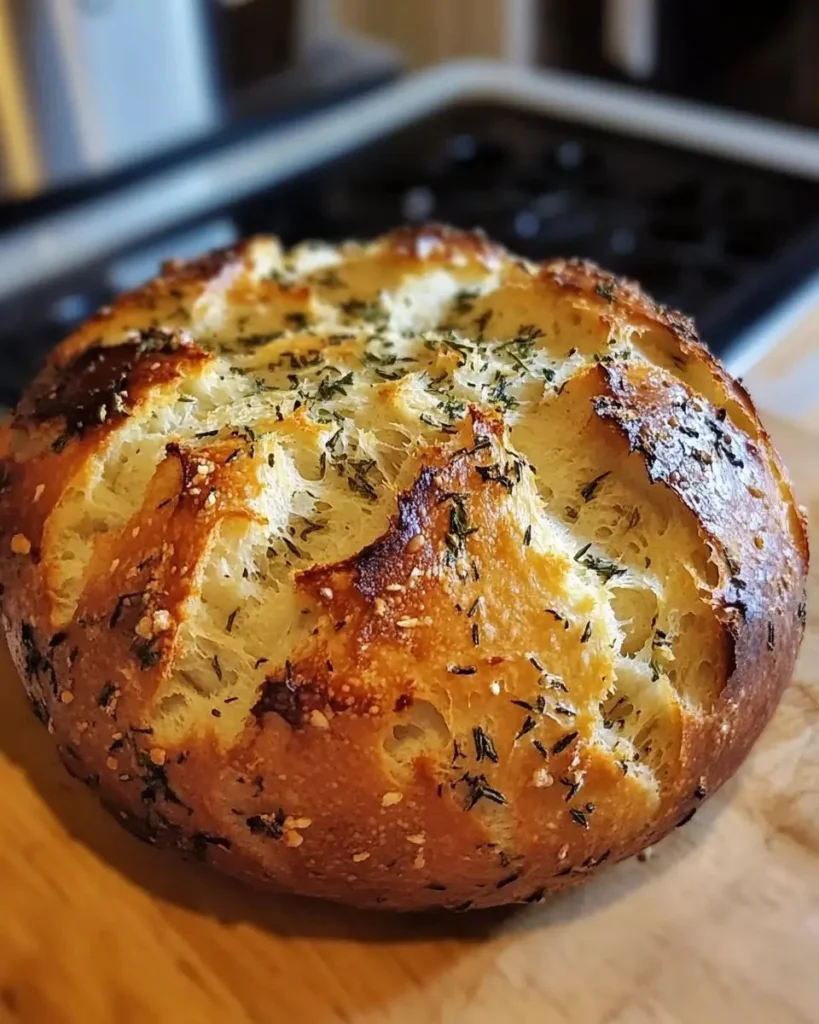
There’s nothing quite like the smell of garlic and fresh herbs drifting through the kitchen as a crusty loaf emerges from a hot Dutch oven — that first crackle when you slice it, the steam that carries buttery, garlicky notes, and the soft, tender crumb that welcomes a smear of olive oil or salted butter. This Garlic Herb Dutch Oven Bread is rustic, comforting, and surprisingly simple: a slow overnight rise gives depth of flavor and a chewy interior while the Dutch oven delivers that irresistible deep-brown crust.
This is the kind of bread you bake on cozy mornings with a cup of coffee, bring to neighborhood gatherings, serve alongside soups and salads for weeknight dinners, or carve up at festive tables where everyone reaches for another slice. If you frequently bake and love loafs with personality, you might also enjoy a sweeter quick-bread companion like this rich banana loaf recipe I recommend tasting and comparing: banana bread with a caramel swirl.
At a Glance
- Prep Time: 15 minutes active; plus 12–18 hours for the long rise
- Cook Time: 45–50 minutes (30 min covered, 15–20 min uncovered)
- Total Time: ~13 to 19 hours (mostly hands-off)
- Servings: 8 generous slices (one medium loaf)
- Difficulty Level: Easy — no kneading required; great for beginners
Nutrition Highlights
Estimated nutrition per serving (1/8 loaf). Values are approximate and based on standard food composition data (USDA FoodData Central) and portion estimates. Sodium guidance references from the U.S. Centers for Disease Control and Prevention (CDC).
- Calories: ~180 kcal
- Protein: ~4.5 g
- Total Carbohydrates: ~34 g
- Dietary Fiber: ~1.2 g
- Sugars: ~0.5 g
- Total Fat: ~2.1 g
- Saturated Fat: ~0.2 g
- Sodium: ~575 mg
Notes: These values are estimates for the whole recipe as written (3 cups all-purpose flour, 1 tbsp olive oil, 2 tsp salt, etc.) divided into eight servings. Sodium is notable because 2 teaspoons of salt across the loaf contributes a substantial amount per slice; if you’re watching sodium, reduce salt to 1 tsp or use lower-sodium salt alternatives. For trusted guidance on daily sodium limits, see CDC resources.
Why You’ll Love It
This recipe excels on aroma and texture. The garlic and herbs infuse the dough during the long rise so each bite tastes balanced and bright rather than surface-sprinkled. The no-knead method is forgiving: minimal hands-on time, maximum payoff. It’s also social-food friendly—bring it to potlucks, tear it up at dinner with olive oil for dipping, or serve it for a lazy weekend brunch. The combination of a crisp, crackly crust and a moist, open crumb brings both nostalgic comfort and artisanal satisfaction.
Method & Process
Ingredients
- 3 cups all-purpose flour, plus extra for dusting
- 2 teaspoons fine sea salt
- 1/2 teaspoon instant yeast
- 1 1/2 cups lukewarm water (90–100°F)
- 4 cloves garlic, minced finely or pressed
- 2 tablespoons fresh herbs (rosemary, thyme, or combination), chopped finely
- 1 tablespoon olive oil, for coating
Optional ingredients and substitutions
- 1 tablespoon honey or sugar for a slightly softer crust (optional)
- 1 tablespoon melted butter brushed on the crust after baking for extra flavor
- Use 1 cup whole wheat flour + 2 cups all-purpose for a nuttier loaf (expect denser crumb)
- Gluten-free: use a tested 1:1 gluten-free flour blend and add a binder (xanthan gum) per blend instructions; texture will differ
- For less sodium: reduce salt to 1 teaspoon or use a lower-sodium salt alternative
Step-by-step instructions
- In a large mixing bowl, whisk together flour, salt, and instant yeast. Add minced garlic and chopped herbs, stirring them evenly through the mixture.
- Pour in lukewarm water and stir with a wooden spoon until no dry flour remains. The dough will look sticky and rough. Avoid overworking — it’s meant to be shaggy.
- Cover the bowl tightly with plastic wrap or a damp towel. Let rise at room temperature for 12 to 18 hours (overnight) until doubled and bubbly.
- Generously flour a work surface and your hands. Gently scrape dough onto the surface and fold edges toward center to create a round shape; do not knead.
- Place shaped dough on oiled parchment paper, cover loosely with a towel, and let rest for 45 minutes to 1 hour until puffy.
- Place a 5–7 quart Dutch oven with its lid in your oven and preheat to 450°F (230°C) for 30 minutes.
- Carefully remove the hot Dutch oven from oven. Using the parchment as a sling, lower dough into the pot. Score the top with a sharp knife or lame to control the expansion.
- Cover with the lid and bake for 30 minutes. Remove lid and bake uncovered for 15 to 20 minutes until deep golden brown and crisp.
- Remove bread from Dutch oven and transfer to a wire rack. Cool for at least 30 minutes before slicing so the crumb sets.
Practical tips
- Avoid overmixing: stir just until combined so the gluten develops slowly during the long rise.
- Check doneness: a fully baked loaf should be deeply browned and sound hollow when tapped on the bottom (or use an instant-read thermometer; internal temp ~200–210°F).
- Handle gently: the dough is high hydration and yields an open crumb when not overworked.
- If you’d like a faster method or another herb-forward approach, compare this to a two-hour rosemary-garlic variation to see if it suits your schedule: a quicker but hearty variation.
Serve It Up
- Simple and perfect: slice warm and serve with butter or olive oil and flaky sea salt.
- For breakfast: toast a slice and top with ricotta, honey, and cracked black pepper.
- Dinner partner: serve alongside tomato soup, roasted vegetable stew, or a leafy salad.
- Entertaining: place several small bowls of flavored olive oils, balsamic reduction, and herb butters for a shareable breadboard.
Keeping it Fresh
- Room temperature: store in a paper bag or wrapped loosely in a clean kitchen towel for 1–2 days to preserve crustiness; an airtight container will soften the crust but keep the crumb moist.
- Refrigeration: not recommended for fresh bread — refrigeration accelerates staling; if you must, keep in an airtight bag for up to 3 days.
- Freezer: wrap whole loaf or thick slices in plastic wrap and then foil. Freeze up to 3 months. Thaw at room temperature and re-crisp in a 350°F oven for 10–15 minutes.
Insider Secrets
- Best flour: high-protein (higher-gluten) all-purpose flour gives a chewier crumb; bread flour works well if you like more structure.
- Garlic technique: press the garlic finely or mince and let it macerate briefly in the water to mellow sharp edges. Roasted garlic can be used for a sweeter, milder garlic note.
- Herb timing: fold fresh herbs into the dry mix so their oils infuse the dough during the long rise; dried herbs can be used but increase quantity by about 50% for the same intensity.
- Crust control: steam is created by the covered Dutch oven — that’s what promotes oven spring and a shiny crust. If you prefer a softer crust, remove the lid earlier or brush the cooled loaf with butter immediately after baking.
Creative Twists
- Olive and Parmesan: fold 1/2 cup chopped kalamata olives and 1/3 cup grated Parmesan into the dough for a salty, savory loaf.
- Cheesy-herbed pull-apart: score and layer slices with slices of mozzarella and herbs before the second rise for gooey pockets.
- Garlic-rosemary focaccia-style: press the dough slightly flatter into a parchment-lined Dutch oven, dimple the top, drizzle extra virgin olive oil, sprinkle extra rosemary and coarse salt, then bake as directed for a hybrid loaf.
- Vegan option: the recipe is already vegan as written (no dairy or eggs); to add richness, brush with olive oil after baking instead of butter.
- Gluten-free option: use a trusted 1:1 gluten-free flour blend and follow blend-specific hydration notes — the texture will be different but still delicious.
All Your Questions Answered
Q: Can I shorten the rising time?
A: You can speed things up by using warmer water and a slightly higher yeast amount, but the long, slow rise develops flavor. For a faster approach, consider recipes developed for shorter timelines (see quick variations).
Q: My loaf is dense — what went wrong?
A: Likely underproofing, too much flour, or overworking the dough. Ensure the dough doubles during the slow rise and keep the dough sticky rather than adding more flour while shaping.
Q: How do I get a crispier crust?
A: Bake in a preheated heavy Dutch oven with the lid on for the first part to trap steam; removing the lid for the final minutes deepens the color. For extra crust, finish under the broiler very briefly while watching carefully.
Q: Can I add seeds or nuts?
A: Yes — fold up to 1/2 cup seeds (sunflower, pumpkin) or chopped nuts into the dough during shaping for texture and flavor.
Q: Is this recipe healthy?
A: It’s a wholesome, minimally processed loaf without added sugar or dairy. Nutrition depends on portion size and any added toppings; if you’re monitoring sodium or calories, adjust salt and portion accordingly.
Conclusion
Baking this Garlic Herb Dutch Oven Bread rewards you with bakery-worthy crust, a fragrant interior, and a ritual that makes any meal feel special. Try it, share photos and notes with fellow bakers, and make it your own with the twists above. For more inspiring no-knead and garlic-herb ideas, check out this two-hour rosemary-garlic approach with a faster timeline: Rosemary Garlic No-Knead Bread, the Two Hour Method, and for another excellent Dutch oven technique that emphasizes an ultra-crusty finish see Dutch Oven No Knead Bread (with perfect crusty crust!).
If you try this loaf, I’d love to hear how you flavored yours — drop a comment or share a photo and join the community of home bakers exploring slow, simple bread.