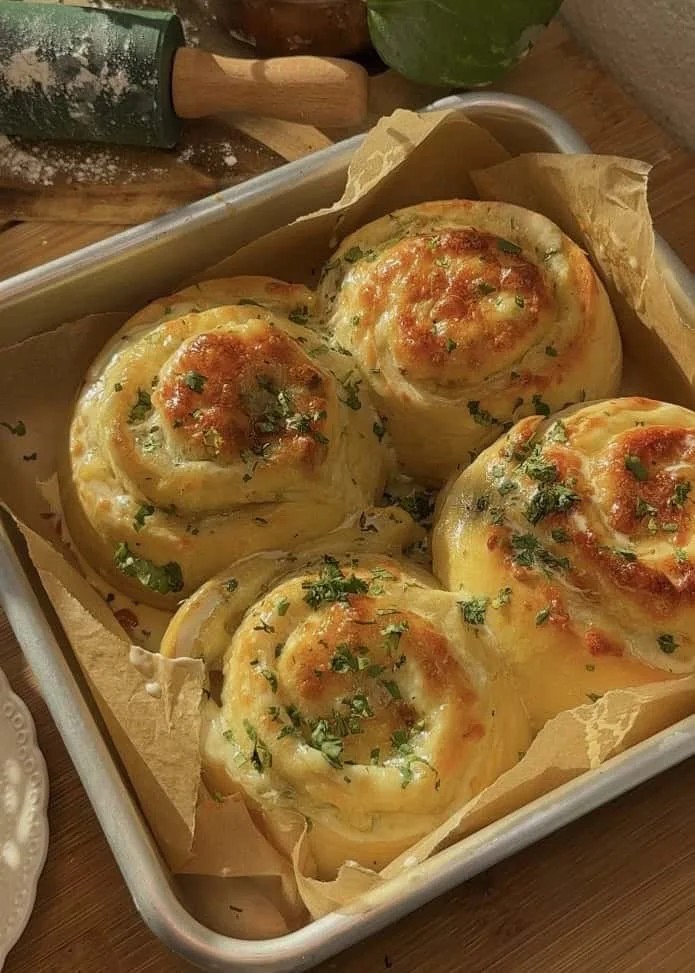
Buttery Cheese Garlic Rolls Everyone Will Love
Imagine pulling a tray of golden, glossy rolls from the oven — the room fills with the warm, savory perfume of roasted garlic and butter, the cheese bubbling beneath a tender, pillowy crust. The first bite is a contrast of textures: a crisp exterior that gives way to soft, airy bread, molten mozzarella stretching like a warm embrace and a bright kiss of parsley. These buttery cheese garlic rolls are comfort food at its best: nostalgic, indulgent, and impossible to resist.
Whether you’re feeding a sleepy weekend brunch crowd, rounding out a weeknight pasta dinner, or sharing bites at a festive gathering, these rolls deliver. They’re substantial enough to stand in for a side dish, yet comforting enough to dunk in soup or enjoy with a steaming mug of coffee on a rainy morning. For another crowd-pleasing baking idea, I sometimes pair them with a sweet centerpiece — see this ultimate carrot cake recipe for inspiration from the same cozy-bakes repertoire.
At a Glance
- Prep Time: 35 minutes active (plus 2 hr garlic roast, 1 hr 30 min first proof, 30 min second proof)
- Cook Time: 20–25 minutes (baking)
- Total Time: ~4 hours 55 minutes (includes passive roasting & proofing)
- Servings: 6 rolls
- Difficulty Level: Intermediate — some patience with proofing, but no advanced techniques required
Nutrition Highlights
Estimated nutrition per serving (1 roll — recipe yields 6):
- Calories: ~445 kcal
- Protein: ~14 g
- Carbohydrates: ~39 g
- Fat: ~26 g
- Fiber: ~1–2 g
- Sodium: variable depending on salt used (moderate)
Notes on accuracy and sources:
- Nutrition estimates are calculated from standard composition data (USDA FoodData Central) and rounded to sensible figures for home-cooked recipes. For general dietary guidance and portioning, trusted resources such as the Mayo Clinic and government nutrition databases were consulted. These numbers should be treated as estimates and will vary with specific brands, exact portion sizes, and optional ingredients such as milk powder. If you need precise values for medical or strict dietary needs, use a food scale and a nutrition calculator with your product labels.
Perfect For…
These rolls hit multiple sweet spots:
- Gathering-friendly: They’re shareable, visually appealing, and satisfy both kids and grownups at potlucks or holiday spreads.
- Comfort & nostalgia: Roasted garlic and bubbling mozzarella deliver classic savory flavors that evoke family dinners and cozy kitchen moments.
- Versatile meals: Enjoy them with soups, salads, or as part of a brunch board — they’re equally good dipped in marinara or spread with extra garlic butter.
- Time-flexible: Most of the time is passive (roasting and proofing), so they’re ideal when you want hands-off baking that still impresses.
How to Make Buttery cheese garlic rolls, everyone will love them!
Ingredients
- 1 head garlic
- Sprinkle of salt (for roasting)
- 30 grams olive oil (for roasting)
- 50 grams butter (softened; for dough and garlic butter)
- 1 tablespoon fresh parsley (chopped)
- 90 grams warm milk (about 100°F / 38°C)
- 7 grams active dry yeast (1 packet)
- 25 grams honey
- 200 grams all-purpose flour
- 50 grams bread flour
- 20 grams milk powder (optional; improves crumb and flavor)
- 25 grams butter (softened; additional for dough)
- 2 egg yolks
- 1 1/2 teaspoon salt
- 1 tablespoon sugar
- 200 grams mozzarella cheese (shredded)
- Garlic butter we made previously (reserve some for brushing)
- 1 egg (for egg wash)
Optional ingredients & substitutions:
- Use part-skim mozzarella for lower fat; or swap for provolone/cheddar for a different flavor.
- Replace milk with a plant-based milk for a dairy-light version (note: impacts texture).
- For a lighter sweetener swap, use agave or maple instead of honey (similar volume).
- To make these dairy-free/vegan: substitute plant butter and vegan cheese, and use a flax “egg” for wash (appearance varies).
Method — step-by-step
-
Roast the garlic
- Preheat oven to 160°C (320°F). In a ramekin, place the garlic head with the top cut off, drizzle with 30 g olive oil, sprinkle with a pinch of salt, cover with aluminum foil, and roast for about 2 hours until cloves are buttery soft. Let cool.
-
Make the garlic butter
- When the garlic is cool, squeeze the soft cloves into a bowl, mash, and mix with 50 g softened butter, chopped parsley, and 2 tablespoons of the garlic oil from the ramekin. Set aside some garlic butter to brush the rolls after baking.
-
Prepare the yeast mixture
- In a small bowl, combine 90 g warm milk, 7 g active dry yeast, and 25 g honey. Let proof about 8–12 minutes until fragrant and frothy.
-
Mix the dough
- In a large mixing bowl (or stand mixer), combine 200 g all-purpose flour, 50 g bread flour, 1 tablespoon sugar, 1 1/2 teaspoon salt, and 20 g milk powder (if using). Add 25 g softened butter, 2 egg yolks, and the yeast mixture. Mix until combined.
-
Knead the dough
- Knead using a dough hook on medium speed for 15–20 minutes, until the dough is soft, smooth, and slightly tacky but not sticky. (If kneading by hand, expect 20–25 minutes.)
-
First proof
- Place dough in a lightly oiled bowl, cover, and proof in a warm place (around 29°C / 85°F) for about 1 hour 30 minutes, or until doubled in size.
-
Roll out and assemble
- Punch down the dough gently and roll it out to about 1/4 cm (≈1/8 inch) thickness on a lightly floured surface. Spread the prepared garlic butter evenly over the surface. Sprinkle 200 g shredded mozzarella evenly. Tightly roll the dough into a log.
-
Cut into rolls
- Cut the log into 6 equal portions with a sharp knife or dental floss (to avoid squashing).
-
Second proof
- Place the rolls seam-side down on a baking sheet or parchment-lined pan, cover loosely, and proof for another 30 minutes until puffy.
-
Bake
- Preheat oven to 175°C (350°F). Brush the rolls with an egg wash (1 beaten egg). Bake for 20–25 minutes; check at 20 minutes — rolls should be golden brown and the internal temperature near 90°C (195°F) in the center if you want precise doneness.
- Finish & serve
- As soon as the rolls come out of the oven, brush with leftover garlic butter and sprinkle with chopped parsley. Serve warm.
Practical tips
- Avoid overmixing after adding cheese — fold in gently to keep the dough light.
- If dough feels too sticky, add flour a tablespoon at a time; if too dry, add a teaspoon of warm milk.
- Use dental floss to cut rolls cleanly without compressing the spiral.
- Check baking sooner if your oven runs hot; rotate the pan halfway for even browning.
Serving Suggestions
Best Pairings
- Serve warm with extra garlic butter for generous dipping.
- Complement with tomato-based dishes — marinara or a chunky tomato soup for a classic combo.
- For brunch, place rolls on a board with sliced cured meats, roasted vegetables, and a bright salad.
- Pair with coffee or black tea for a cozy breakfast, or with a crisp white wine for evening gatherings.
- For a dipping trio: marinara, herbed olive oil, and a lemony yogurt dip (yogurt + lemon + garlic + salt).
Storage Instructions
Shelf Life & Storage
- Room temperature: Store in an airtight container or wrapped in foil for up to 2 days. Reheat in a 160°C (320°F) oven for 5–10 minutes to refresh.
- Refrigeration: Keep in a sealed container for up to 4 days. Reheat gently to restore softness.
- Freezer: Wrap each roll tightly in plastic wrap and place in a freezer-safe bag for up to 2 months. To reheat, thaw overnight in the refrigerator and warm in a 160–175°C (325–350°F) oven for 8–12 minutes until heated through.
Chef’s Advice
- Best cheeses: Low-moisture part-skim mozzarella gives excellent stretch without excess moisture; for more flavor, blend in 25–50 g of aged cheddar.
- Texture keys: Knead until the dough is smooth and elastic — under-kneaded dough yields dense rolls; over-kneaded dough (or over-proofed) can collapse.
- Doneness cues: Golden top, hollow sound when tapped lightly, and an internal temp near 90°C (195°F) indicate done bread.
- Garlic intensity: Roast longer for a sweeter, milder garlic; if you prefer a sharper garlic punch, reduce roast time slightly or fold in a small amount of raw minced garlic to the butter.
- Make-ahead: Shape rolls and refrigerate overnight in the covered proofing pan; let sit at room temp for 30–45 minutes before baking.
Creative Twists
- Herb & Lemon: Add 1 tsp finely grated lemon zest and 1 tsp chopped rosemary to the garlic butter for a bright herbal lift.
- Spicy Pepperoni-Cheese: Sprinkle 50 g chopped pepperoni or salami and a pinch of red pepper flakes with the mozzarella for a pizza-roll variation.
- Vegan Version: Use vegan butter and a plant-based shredded mozzarella; replace egg wash with a plant milk + maple syrup glaze for browning.
- Gluten-free: Use a 1:1 gluten-free flour blend designed for yeast breads and add an extra 10–15% hydration (milk) plus 1 tsp xanthan gum if your blend lacks it — expect a different, denser texture.
- Sweet-savory: Brush the rolls with a honey-butter glaze after baking and finish with flaky sea salt for an irresistible contrast.
Common Questions & Answers
Q: Can I use active dry yeast straight without proofing?
A: It’s best to proof active dry yeast in warm milk and honey as directed; it ensures the yeast is active. Instant yeast can be mixed directly with dry ingredients.
Q: My rolls are dense — what went wrong?
A: Common causes are under-kneading, insufficient proofing time, or using water that’s too hot/killing the yeast. Ensure dough is elastic and proofs until doubled.
Q: Can I make these ahead and bake later?
A: Yes — after shaping the rolls, cover and refrigerate overnight. Bring to room temperature and allow a short proof (30–45 minutes) before baking.
Q: How do I reduce calories or fat?
A: Use part-skim mozzarella, reduce butter by 25% (retaining some for flavor), or bake smaller rolls to control portion size. Note: texture will change.
Q: Can I add more cheese or fillings?
A: Absolutely — add up to 50–100 g extra cheese or folded-in fillings, but expect a slightly heavier roll.
Conclusion
These buttery cheese garlic rolls are a celebration of simple ingredients elevated by slow-roasted garlic and melty mozzarella — perfect for sharing or savoring solo. Try the method as written the first time, then experiment with the variations above to make them your own. If you loved this recipe, you might also enjoy this take on a similar classic found at Buttery cheese Garlic Rolls – archer’s food, and for a complementary cheesy-bread inspiration, check out the recipe at Cheesy Garlic Dinner Rolls – I Am Homesteader. Share your photos and notes — I’d love to hear how your rolls turned out and what creative twist you tried!