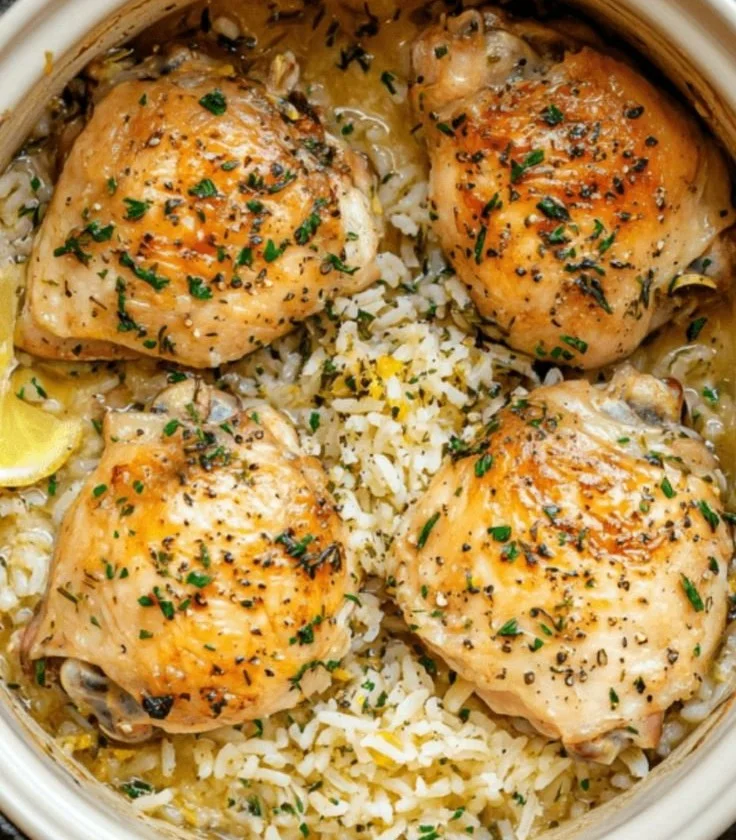
Japanese Inspired Chicken and Egg Rice Bowl
There’s something utterly comforting about the smell of warm dashi and soy mingling with seared chicken and silky eggs — it wraps around you like a familiar blanket. This Japanese-inspired chicken and egg rice bowl (think oyakodon) greets you with an umami-forward aroma, a harmony of tender, slightly caramelized chicken, soft-silky ribbons of egg, and a glossy, savory sauce that soaks into steaming rice. The textures are addictive: juicy, slightly crisped chicken, the melt-in-your-mouth eggs, and the contrast of scallions’ fresh snap.
This bowl is perfect for weekday dinners when you want something fast but nourishing, cozy solo breakfasts that feel indulgent, and informal gatherings where everyone wants a homely warm plate. If you like rice bowls with big comforting flavors but minimal fuss, you’ll want this in your regular rotation — and if you enjoy trying variations, you can easily riff on it (try a spicy or citrus twist). For a spicy-sweet riff on a similar weeknight bowl, I like pairing this with ideas from my hot honey chicken bowl recipe, which balances sweet and heat beautifully: hot honey chicken bowl recipe.
At a Glance
- Prep Time: 10 minutes
- Cook Time: 15 minutes
- Total Time: 25 minutes
- Servings: 4 (serving is the chicken + egg topping; rice is not included in nutritional count below unless noted)
- Difficulty Level: Easy — beginner-friendly, quick technique
Nutrition Highlights
Estimated nutrition per serving (one-fourth of the cooked chicken-and-egg topping, excluding rice). Estimates are based on USDA FoodData Central ingredient values and typical portion sizes; actual values will vary by brand and exact ingredient choices.
- Calories: ~480 kcal per serving (topping only)
- Protein: ~32 g
- Carbohydrates: ~8 g
- Fat: ~32 g
- Fiber: ~1.5 g
- Sodium: ~1,200 mg
Notes on these numbers:
- Sodium is elevated because of the soy sauce and vegetarian oyster sauce; swapping for low-sodium soy sauce or reducing quantities will lower sodium (sources: USDA FoodData Central; Mayo Clinic guidance on sodium reduction).
- If you add 1 cup (about 158–200 g) of steamed white rice, add roughly +200–250 kcal, +45 g carbs, and +4 g protein (USDA rice data).
- These are estimates meant to guide planning and are not a medical analysis. For precise tracking, weigh your actual ingredients and consult FoodData Central or a registered dietitian.
Perfect For…
- Cozy solo mornings when you want a savory, warming start.
- Weeknights when you need something quick but with restaurant-style depth.
- Casual family dinners that please picky and grown-up palates alike — the balance of egg and chicken is universally comforting.
- Celebrations of simplicity: this dish is often served in Japan for homey occasions where warmth and family matter more than formality.
Method & Process
Ingredients (serves 4; list is precise):
- 4 boneless chicken thighs (about 600 g total), trimmed and cut into bite-size pieces
- 1.5 tablespoons soy sauce (for marinating)
- 1 tablespoon vegetarian oyster sauce
- 1/2 teaspoon black pepper
- 2 tablespoons cornstarch
- 1 small onion, thinly sliced
- 1 tablespoon neutral oil (avocado or canola oil)
- 4 eggs, lightly beaten
- 3/4 cup dashi (chicken or vegetable stock)
- 2 tablespoons soy sauce (for the simmer sauce)
- 1 tablespoon mirin (or 1/2 tablespoon sugar as substitute)
- Green onion, thinly sliced, for garnish
Optional ingredients / substitutions: - Low-sodium soy sauce (to reduce sodium)
- Use 1 tablespoon sugar + 1 tablespoon water instead of mirin for alcohol-free option
- Swap vegetarian oyster sauce for hoisin (slightly sweeter) or use mushroom soy sauce for extra depth
- For gluten-free: use tamari in place of soy sauce and cornstarch is already gluten-free
- For a lighter version: use 2 chicken breasts (about 600 g) instead of thighs, but watch for slightly drier texture
Step-by-step instructions:
- Season the Chicken: In a bowl, combine the chicken pieces with 1.5 tablespoons soy sauce, 1 tablespoon vegetarian oyster sauce, and 1/2 teaspoon black pepper. Add 2 tablespoons cornstarch and toss just until the pieces are lightly coated — avoid overmixing to keep the coating even and not gummy. Let sit 5 minutes while you prepare other ingredients.
- Pan-Fry the Chicken: Heat 1 tablespoon neutral oil in a large skillet over medium-high heat. Add the chicken in a single layer and cook 2–3 minutes per side until golden and about 80% cooked through (internal color will still be slightly pale). Remove chicken and set aside. Don’t overcrowd the pan; cook in batches if needed.
- Sauté the Onion: In the same pan, add the sliced onion and sauté 3–4 minutes until fragrant and slightly softened, scraping up browned bits from the chicken — those bits are flavor gold.
- Add Sauce & Simmer: Pour in 3/4 cup dashi, 2 tablespoons soy sauce, and 1 tablespoon mirin (or alternate). Stir to combine, then return the chicken to the pan. Let it simmer gently for about 4 minutes so the chicken finishes cooking and absorbs flavor. Adjust heat so the liquid is at a low simmer, not a boil.
- Finish with Eggs: Reduce heat to low. Slowly pour the lightly beaten eggs evenly around the chicken and onions. Cover with a lid and cook 1–2 minutes until eggs are just set but still soft and silky (the residual heat will finish them). Avoid cooking until dry — you want glossy, custardy egg.
- Serve: Spoon the chicken, eggs, and sauce over warm bowls of steamed rice, garnish with sliced green onion, and enjoy immediately.
Practical tips:
- Cornstarch creates a thin glaze; don’t use too much or the texture will be gummy.
- If using chicken breasts, slice thinly for fast cooking and better tenderness.
- To check egg doneness, gently lift the lid and peek — eggs should be softly set, not runny or rubbery.
- Taste the sauce before adding the eggs; if it’s too salty, add a splash of water or dashi.
Best Pairings
- Simple steamed white rice for a classic experience — the sauce is meant to soak in.
- Brown rice or mixed grain rice for extra fiber and a nuttier flavor.
- Quick sides: lightly dressed cucumber salad, pickled ginger, or blanched spinach with sesame oil.
- Drinks: hot green tea or a light, crisp lager for dinner; stick to warm teas for breakfast/brunch.
- For a richer touch, serve with a pat of butter stirred into the rice (yes — it’s comforting and delicious).
You can also explore a related bowl with more heat and sweet notes in this 30-minute variation that combines corn and bold flavors: 30-minute street corn chicken rice bowl.
Storage Instructions
- Room temperature: This dish should not be kept at room temperature for more than 2 hours.
- Refrigerator: Store chicken-and-egg topping in an airtight container for up to 3–4 days. Reheat gently on the stovetop over low heat or in the microwave with a splash of water or stock to keep eggs from drying.
- Freezer: Freezing the topping is possible but not ideal — eggs change texture when frozen. If you must, freeze for up to 2 months in a freezer-safe container; thaw overnight in the fridge and reheat slowly. For best results, freeze cooked chicken separately from the egg custard and re-cook eggs fresh.
Chef’s Advice
- Texture is everything: aim for eggs that are just set and still glossy — that custardy texture is signature.
- Use a well-seasoned nonstick or cast-iron skillet to get good browning on chicken without sticking.
- Dashi adds authentic umami; if you don’t have dashi, a low-sodium chicken or vegetable stock works, but add a small pinch of kombu powder or a teaspoon of miso for depth.
- Control salt by starting with less soy sauce in the sauce step and tasting before finishing — you can always add more.
- If you prefer more sauce for your rice, increase dashi by 1/4 cup and simmer a little longer.
Creative Twists
- Spicy Miso Oyakodon: Stir 1 teaspoon gochujang or a teaspoon of miso into the simmer sauce and garnish with shichimi togarashi for heat and complexity.
- Mushroom & Tofu Vegan Twist: Replace chicken with firm tofu (pressed and pan-fried) and use a mushroom-based dashi and whisked chickpea flour batter (aquafaba + chickpea flour) to mimic egg texture for a vegan-friendly bowl.
- Citrus-Soy Brightness: Add 1 teaspoon yuzu juice or a squeeze of lime just before serving to brighten the sauce and cut richness.
- Gluten-free: Use tamari instead of soy sauce and ensure vegetarian oyster sauce is gluten-free; cornstarch is already gluten-free.
All Your Questions Answered
Q: Can I make this ahead for meal prep?
A: Yes—cook the chicken and onions and store separately. Reheat and add freshly beaten eggs to finish for best texture; fully cooked eggs tend to dry out if reheated.
Q: Is there a gluten-free option?
A: Absolutely—swap soy sauce for tamari and confirm vegetarian oyster sauce is gluten-free (or substitute mushroom-based glaze).
Q: My eggs overcook quickly — how to avoid rubbery eggs?
A: Lower the heat and cover only briefly. Residual heat will finish them. Don’t pour eggs on a roaring simmer.
Q: Can I use chicken breast instead of thighs?
A: Yes — slice thinly so they cook quickly and remain tender. Thighs give more richness and are more forgiving.
Q: How do I reduce sodium without losing flavor?
A: Use low-sodium soy sauce, add a splash of rice vinegar or a pinch of sugar to balance, and taste before adding salt.
Conclusion
I hope this recipe inspires you to make a warm, soulful bowl that feels like home — the quick sear, the savory-sweet simmer, and the silky eggs come together in under 30 minutes and reward you with big comfort. If you’d like a classic reference for oyakodon technique and history, this detailed guide is a helpful companion: Oyakodon (Japanese Chicken and Egg Rice Bowl) Recipe. For another approachable home cook version and step-by-step visuals, see this friendly recipe walkthrough: Easy Oyakodon: Japanese Chicken and Egg Rice Bowl – Tiffy Cooks.
If you try the recipe, please share a photo and your tweaks in the comments — I love seeing reader versions and swapping tips. Enjoy your bowl!