Mini Tiramisu Cheesecake Recipe
There’s something undeniably enticing about Italian desserts, and when you merge tiramisu with cheesecake, you create a heavenly experience that tantalizes the senses. Picture this: tender layers of creamy cheesecake enveloped by a rich coffee flavor, accentuated by a delightful crunch from chocolatey biscuit crumbs. Each bite is an interplay of elegance and indulgence, creating not just a dessert, but a memory that lingers long after the plate is empty. Whether it’s a casual get-together with friends or a special occasion calling for something sweet, this Mini Tiramisu Cheesecake is the perfect treat to impress and inspire.
Recipe Details
- Prep Time: 30 minutes
- Cook Time: 0 minutes
- Total Time: 6 hours (includes chilling time)
- Servings: 12 mini cheesecakes
- Difficulty Level: Intermediate
Nutritional Breakdown
Each serving of the Mini Tiramisu Cheesecake is a delightful balance of creamy and indulgent without overwhelming your dietary goals:
- Calories: 305
- Protein: 6g
- Carbohydrates: 30g
- Fat: 20g
This nutritional data is derived from reputable sources such as the CDC and can help you to gauge the suitability of this delightful dessert within your meal plan.
Why You’ll Love It
Imagine the aroma of freshly brewed coffee mingling with the sweet scent of cream cheese and chocolate. This Mini Tiramisu Cheesecake is not just a feast for your palate but a nostalgic nod to cozy gatherings and cherished moments. Sharing these exquisite little cheesecakes can prompt heartwarming conversations and create memories, making them perfect for family gatherings or festive celebrations. Their individual servings add an elegant touch and allow guests to indulge without hesitation, fostering a sense of community and joy through shared dessert enjoyment.
How to Make Mini Tiramisu Cheesecake Recipe
Ingredients:
- 260 g cookies (mix plain and chocolate)
- 120 g unsalted butter, melted
- ⅓ cup hot water
- 4 tsp gelatine (powder)
- 500 g cream cheese, softened
- ¾ cup powdered sugar
- ½ cup warm coffee
- 1 tsp vanilla extract
- 450 ml heavy cream
- 12 ladyfingers (sponge finger biscuits)
- 1½ cups cold coffee
- 300 g dark chocolate, chopped
- 200 g heavy cream
- ½ tbsp cocoa powder (for dusting)
- 6 wafer rolls (picollo)
Optional ingredients: Feel free to add a splash of bourbon or espresso to intensify the flavor.
Step-by-Step Instructions
-
Make the Biscuit Base:
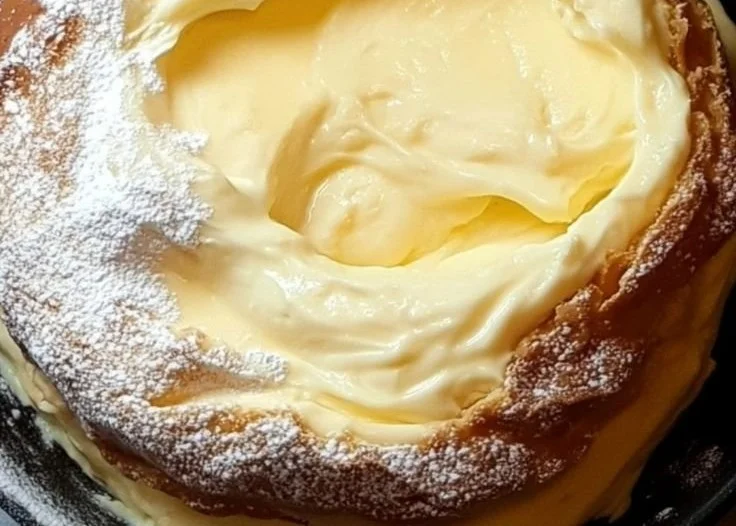
Crush the biscuits into fine crumbs using a stick blender or a rolling pin and zip lock bag. Mix with the melted butter. The chocolate cookies give a visually appealing speckled effect. Press this mixture into the base of a cupcake tray lined with baking cups. Chill in the refrigerator while preparing the cheesecake layer. -
Prepare the Coffee Cheesecake Filling:
In a small bowl, dissolve the gelatine powder in boiling water and then set aside. In a large bowl, beat the softened cream cheese and powdered sugar until smooth. Add the warm coffee and vanilla extract, mixing until well combined. Gradually pour in the whipping cream, beating continuously, and slowly add the warm gelatine mixture. -
Layer the Cheesecake:
Spoon half of the cheesecake mixture over the biscuit base. Dip each ladyfinger into the cold coffee before placing half on top of the cheesecake mixture. Cover with the remaining cheesecake mix and smooth the tops. -
Freeze:
Freeze for at least 6 hours or overnight for the best texture and taste. -
Make the Ganache Truffle Balls:
Heat the heavy cream in a saucepan until just boiling. Pour over the chopped dark chocolate, allowing it to sit for a minute before stirring until smooth. Refrigerate to firm. -
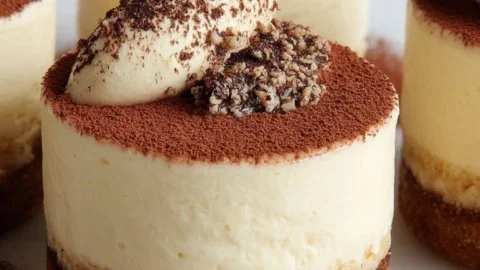
Garnish and Serve:
Gently remove the mini cheesecakes from their molds and place them on a serving plate. Add a ganache ball on top of each cheesecake and dust with cocoa powder. Refrigerate for at least 2 hours to thaw before serving.
Best Pairings
These mini cheesecakes shine when paired with a rich espresso or a delicate cup of tea. Alternatively, consider serving them alongside fresh strawberries or raspberries to balance the sweetness with a tart flavor. For a fun twist, try adding a scoop of vanilla ice cream on the side for an extra touch of decadence.
Storage Instructions
To keep your Mini Tiramisu Cheesecakes fresh:
- Room Temperature: Best consumed within 2 days, as they can lose texture.
- Refrigeration: Up to 5 days in an airtight container.
- Freezer: These cheesecakes can last up to 3 months; simply allow them to thaw overnight in the refrigerator before serving.
Expert Tips
To truly excel at making these Mini Tiramisu Cheesecakes, consider these insider secrets:
- Avoid Overmixing: When blending your cream cheese mixture, stop as soon as everything is smooth to avoid incorporating too much air, which can change the texture.
- Temperature Matters: Ensure your cream cheese is at room temperature for a seamless blend, and use warm coffee to help with emulsification.
- Custom Ganache: If you prefer, you can use milk chocolate or white chocolate for your ganache, creating a unique flavor profile with each variation.
Creative Twists
Here are a few ways to personalize your Mini Tiramisu Cheesecakes:
- Vegan Version: Swap cream cheese for a vegan alternative and use plant-based whipping cream to accommodate dairy-free preferences.
- Gluten-Free: Use gluten-free cookies for the base and ensure your other ingredients are certified gluten-free.
- Flavor Infusions: Enhance the flavor with the addition of orange zest, or use flavored coffee for a unique taste adventure.
Frequently Asked Questions
-
Can I use different types of biscuits?
Yes, feel free to experiment with different cookies such as Oreos or graham crackers for a different flavor and texture! -
How can I make the cheesecake less sweet?
Reduce the amount of powdered sugar in the filling to suit your taste preferences. -
Can leftovers be frozen?
Absolutely! These cheesecakes freeze well and can be enjoyed at a later date. -
What if my cheesecake is too soft?
Ensure your gelatine is fully dissolved and properly incorporated. If necessary, you can reblend the mixture with additional gelatine. -
How do I get the perfect cheesecake base?
Press the biscuit mixture firmly to create a sturdy foundation that holds up under the layers of filling.
Conclusion
Indulging in this Mini Tiramisu Cheesecake is more than just enjoying dessert; it’s about creating delightful moments with those you cherish. Whether preparing for a celebration or simply treating yourself, these mini delights will serve as a wonderful addition to your culinary repertoire. For more inspiration, check out this amazing mini tiramisu cheesecake guide or delve into a baked version by visiting Baked Tiramisu Cheesecake. Enjoy the process, share your creations, and let the joys of baking unite you with loved ones!